
Using the object selection dialogue |

|

|

|

|
||
|
Using the object selection dialogue |
|
|
|

|

|
Using the object selection dialogue
|
Using the object selection dialogue |
|
|
|
|
||
|
Using the object selection dialogue |
|
|
|
|
|
|
|
||
Whenever there is a requirement to select one or more objects from the persistent tree, but it is not known which collection the objects are to be selected from, the Persistate run-time puts up the object selection dialogue box. You can also use this dialogue from your own code - it is displayed by the UserInterface.SelectObjects method. See the API documentation for details.
Persistate applications, including Generator and Configurator, display this dialogue automatically in two circumstances.
| ▪ | When you execute the Add operation objects on a target associated collection which has either a within clause or no from or within clause at all. |
| ▪ | When you click the lookup button on a Nominative and lookup or Nominative access lookup text box bound to an associated scalar member which has either a within clause or no from or within clause at all. |
For example, when you execute the Add operation for the Test environment's available packages collection, the displayed dialogue will look something like this.
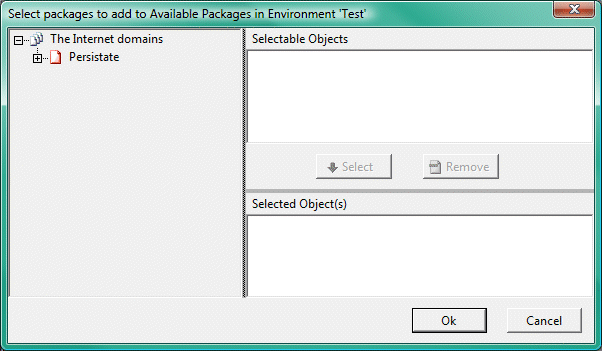
The select objects dialogue box
To select one or more packages, you browse through the tree on the left until you find the package collection containing the package you want, and then click on the text of that node. As you browse, you will notice that only nodes which are package collections or have package collections within them at some level are displayed. When you click on a package collection node, the packages in the collection are displayed in the Selectable Objects pane.
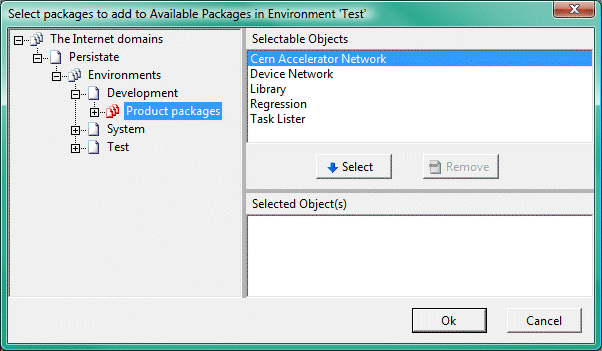
The Development environment packages are now selectable
Now just highlight the packages you want to select from that collection and click Select. The packages are copied to the Selected Objects pane. You can repeat this for any number of collections. For example if you also want to add the Persistate package from the System environment, then navigate to the appropriate collection and click the node.
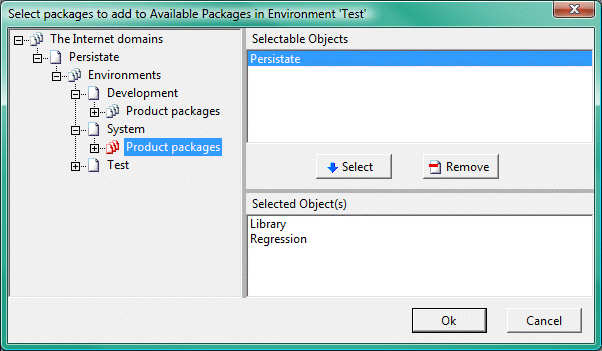
Two packages selelcted, and one now selectable
Highlighting the Persistate package and clicking Select now copies that package to the Selected Objects pane. If you change your mind about adding a package, you can remove it from the Selected Objects pane by highlighting it and clicking Remove. Once you have selected all the packages you want to add, click Ok.
In the above example, all of the collections in the tree are collections of several objects, and they can either be expanded in the tree on the left or listed in the pane on the right. However, if a collection contains many objects, then this is not possible. In such cases, Persistate replaces the Selectable Objects pane with the appropriate Lookup form. Here is an example from the Device Network package used in the Creating and running the Device Network demonstration walkthrough.
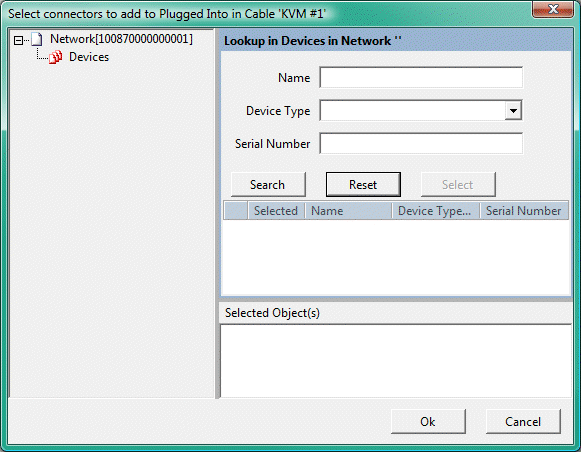
Looking up a collection of many objects
Here, we are adding associated Connector objects to the Cable.PluggedInto collection. The connectors can be anywhere within the network, but they belong to Device objects, and there are many devices in the network, so first we have to find the devices we want. When you click the Devices node, Persistate displays the Device Lookup. Here we're plugging in a KVM cable which has one connector on the KVM switch and two on the computer. So we need to find those devices. Clicking Search, and selecting the two devices gives the following.
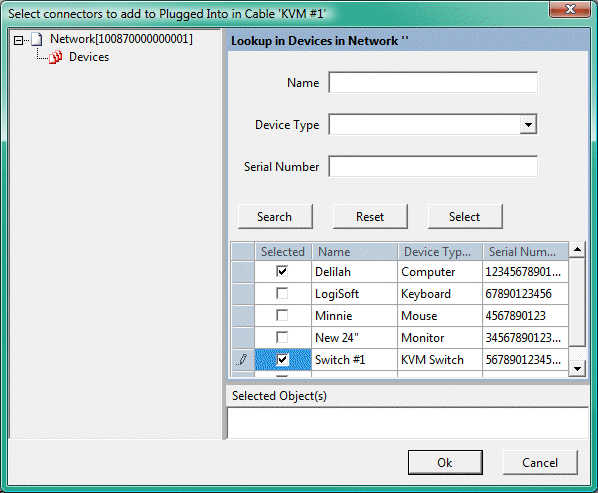
The computer and KVM switch selected in Lookup
Now if we click the Select button, the selected devices are added to the tree under the Devices node. We can now continue to browse the tree down into the selected devices and add the appropriate connectors, in the same way we added packages above. The dialogue should end up looking something like this.
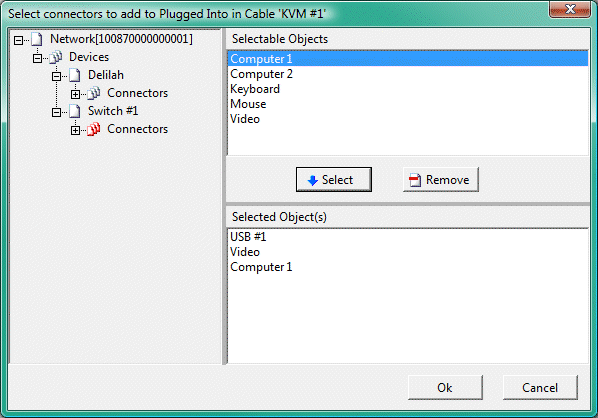
Three connectors now selected
Clicking Ok adds the connectors to the collection. One aspect not shown here is that if a collection is of many diverse objects, then an additional drop down box is added to the top of the lookup form, allowing you to select the class of object you want to search for.
